Do you receive an excessive amount of spam comments, registrations, or unauthorized login attempts? Do you want to stop anyone from filling up your BuddyPress, WooCommerce, and Easy Digital Downloads forms without your permission? If so, using Google reCAPTCHA on your WordPress site is the best way to solve all of these issues.
There are various techniques to safeguard your website against spam comments and pointless login or registration attempts. In this tutorial, we’ll walk you through the process of adding Google reCAPTCHA to WordPress forms step by step.
Table of Contents
ToggleTrying to add RECAPTCHA to WordPress?
As WordPress is so well-liked, spammers who want to spoof registrations or attempt to brute force your login page to take control of your site find it an appealing target. Installing a WordPress login CAPTCHA enabled by Google reCAPTCHA is one simple approach to secure your login process and guard against spam on your website. You might wish to add a CAPTCHA to your registration and lost password forms if you permit public registration in order to stop abuse there as well.
The core program of WordPress does not have any functionality for reCAPTCHA, but a plugin makes it simple to add security measures, and that is the subject of this article. This user-friendly tutorial will show you how to use the free Profile Builder plugin to add reCAPTCHA to WordPress login, registration, and lost password forms.
This approach costs nothing and requires no coding expertise. All you have to do to start protecting your site is install a plugin and click a few buttons.
What is Google reCAPTCHA?
Completely Automated Public Turing Test to Tell Computers and Humans Apart is abbreviated as CAPTCHA. It is a technology that can be used to distinguish between human users and automated users like robots.
A more sophisticated version of Google’s free CAPTCHA tool, known as reCAPTCHA, helps safeguard websites against spam and abuse. Google reCAPTCHA prevents automated software from easily accessing your website while making it simple for actual people to do so.

What Is Profile Builder? How Does It Help You with WordPress reCAPTCHA?
A free WordPress plugin called Profile Builder can help you improve the functionality of your user profile, registration, and login processes. To use reCAPTCHA with Profile Builder, you have two choices:
- Your WordPress login, signup, and password recovery forms can now include reCAPTCHA.
- Create new, unique login, registration, and password recovery forms using reCAPTCHA using the Profile Builder. This method has the advantages of allowing you to completely customize the fields on your registration form and allowing you to position the forms wherever on your website.
Examples of the WordPress Login CAPTCHA
Here is an illustration of a WordPress login CAPTCHA on the standard WordPress login form:
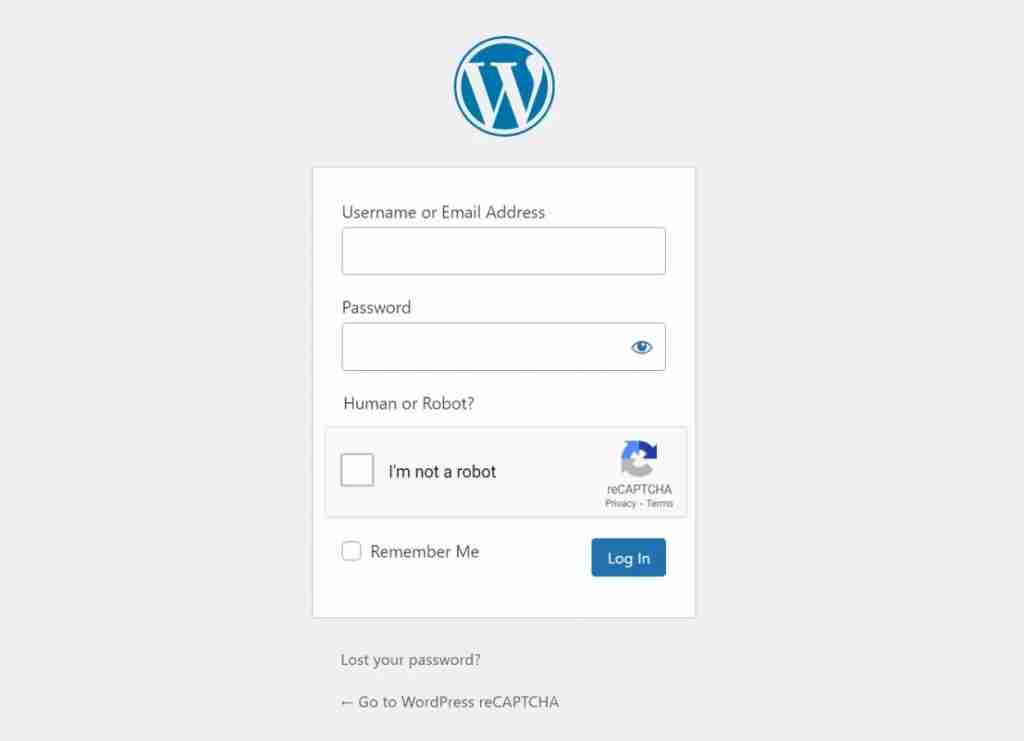
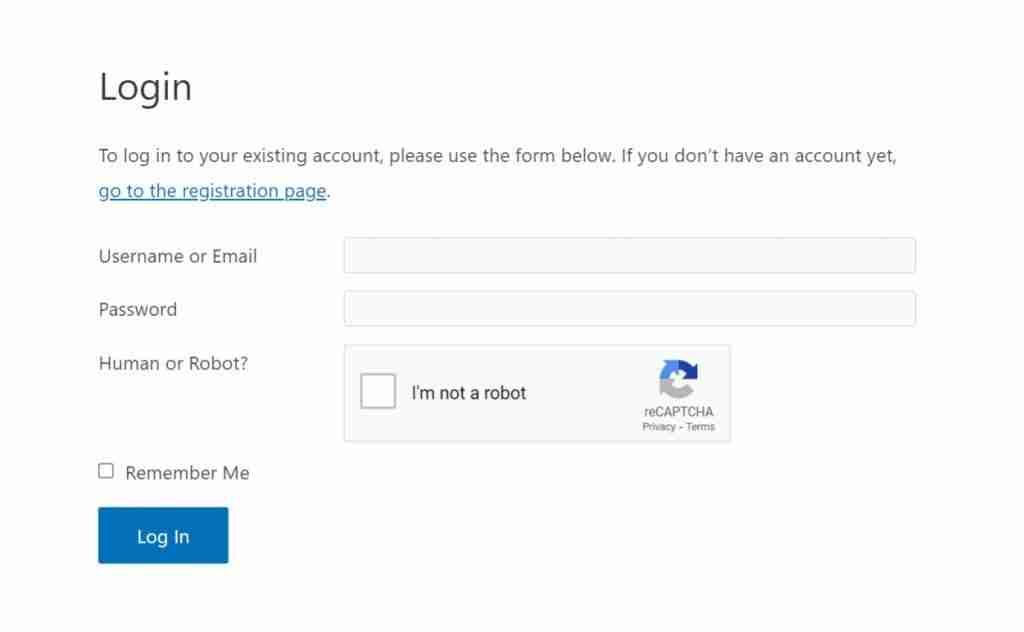
Here’s an illustration of how the WordPress login CAPTCHA appears on a customized form:
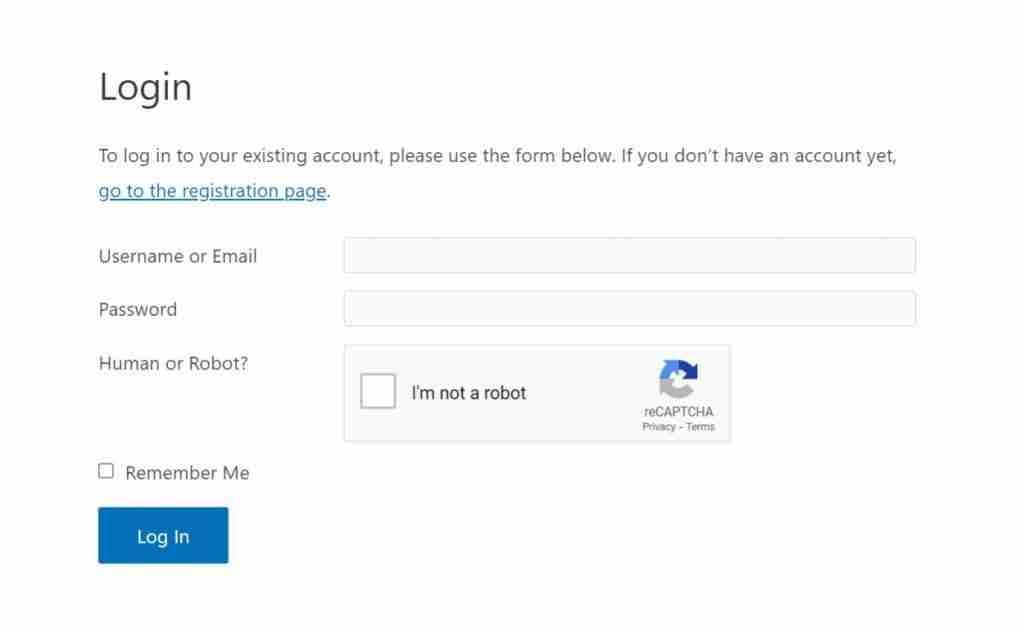
If you accept registration, you may also include reCAPTCHA on your password reset forms as well as the standard or customized registration form.
How to Add reCAPTCHA to WordPress
Let’s discuss how to utilize Profile Builder to install reCAPTCHA on your website now that you are familiar with how it operates:
1. The Profile Builder Plugin should be installed and activated.
Install and activate WordPress.org’s free Profile Builder plugin to get started.
The reCAPTCHA technology is included in the free version of Profile Builder, so you won’t have to pay anything to add reCAPTCHA to your site, even though the premium version of Profile Builder adds many valuable features.
2. Personalize and Showcase Your Forms (Optional)
If you wish to continue utilizing the standard WordPress login, registration and lost password forms, you may skip this step and move on to the next one.
The fact that Profile Builder enables you to design your own unique registration, login, and lost password forms, as well as a front-end edit profile form (though you don’t need a CAPTCHA for that since it’s only visible to logged-in users), makes it preferable to other reCAPTCHA WordPress plugins, as we previously mentioned.
You can use shortcodes to place these forms anywhere on your site, including in page builder designs from plugins like Elementor. This means that you can create a better URL (e.g., yoursite.com/login) and you can also customize the design of your login and registration pages.
Additionally, you can completely customize the fields on your registration form if you let public registration. If you decide to do this, you can edit the form fields by going to Profile Builder Form Fields. You can change or remove the existing fields as well as add new ones. Additionally, you can reorder the fields on your form using drag-and-drop.
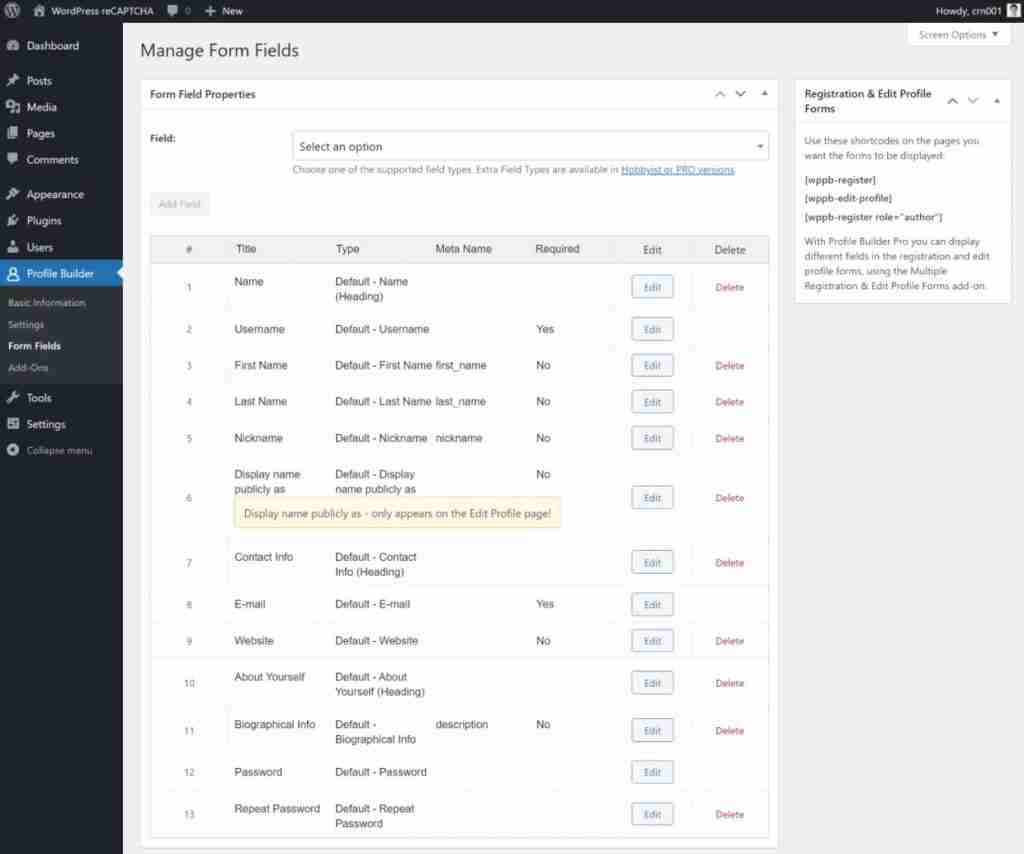
Once you’re satisfied with the form’s fields, you can show the forms anywhere on your website by using Profile Builder’s shortcodes.
The shortcodes that you must include are as follows:
- Registration form – [wppb-register] – To automatically assign users who utilize this form to a certain WordPress user role, you can also provide a role option. For example, [wppb-register role=”author”].
- Login form – [wppb-login] – By including a parameter like this, you may also reroute people to a certain page when they log in.
- Lost password form – [wppb-recover-password]
For instance, you would build a new page (Pages Add New) and include the shortcode to create a specific login page. If necessary, you can also add your own original content:
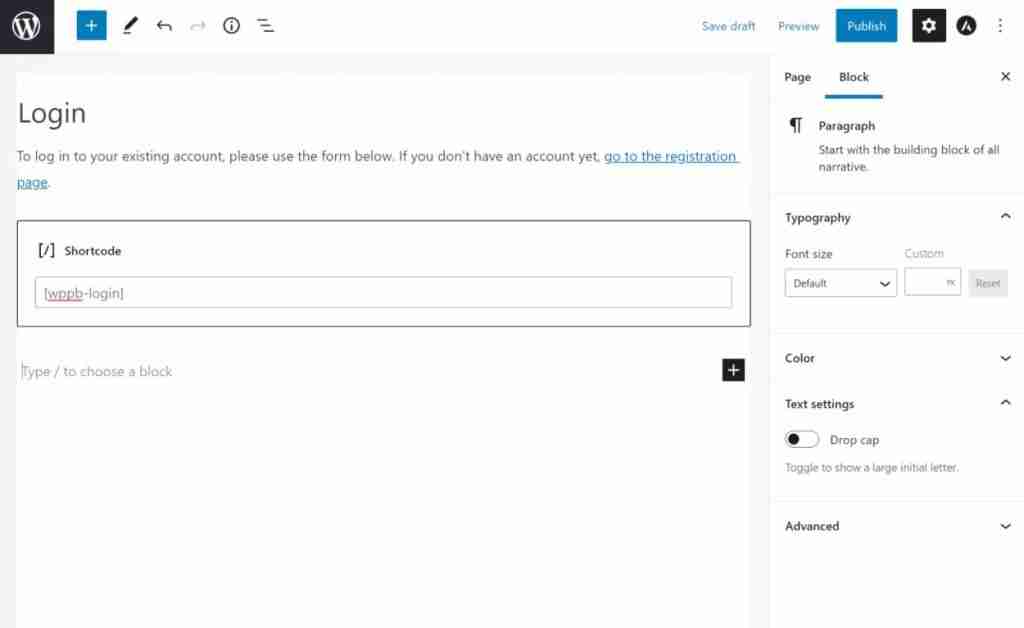
3. Create Your Google reCAPTCHA API Key
You must obtain a Google reCAPTCHA API key in order to link your WordPress website to the Google reCAPTCHA service. It costs nothing to create and use this API key (up to one million requests per month, which your site will almost certainly never come close to exceeding).
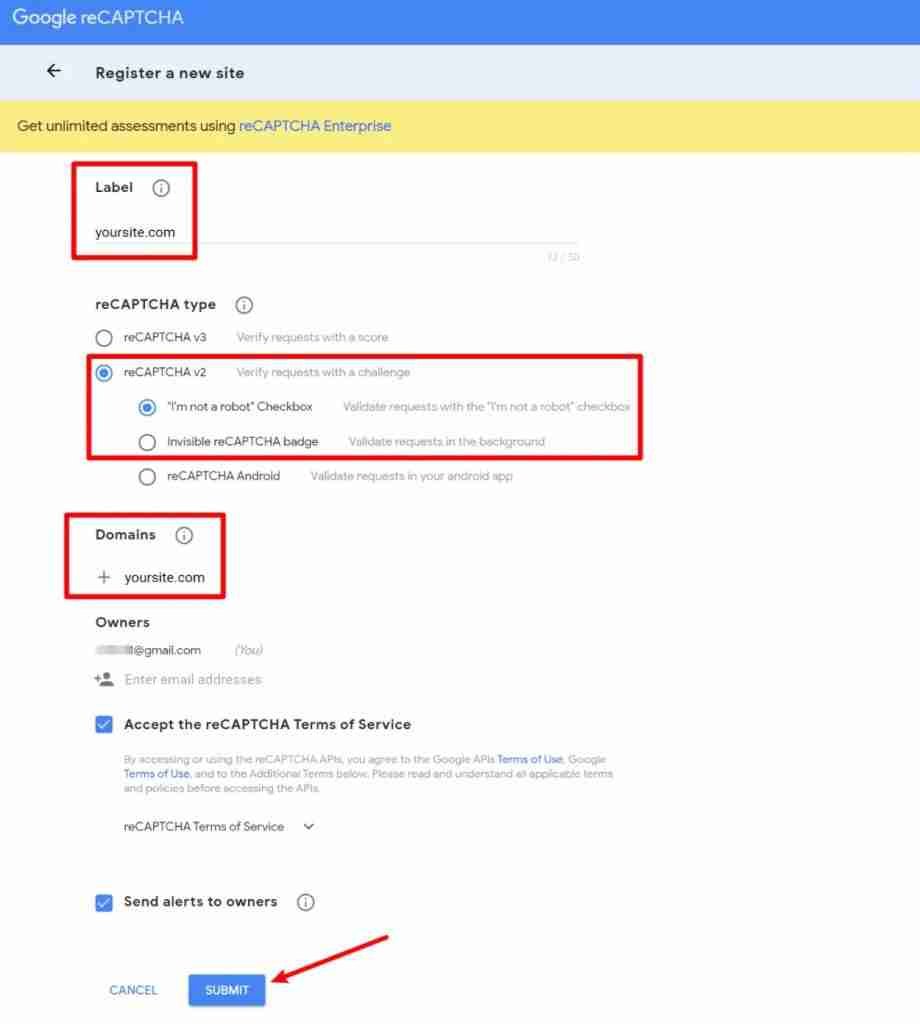
First, type the name of your website into the Label box.
The next step is to select your reCAPTCHA type. The most often used way to use Google reCAPTCHA is through two levels of protection that Profile Builder supports:
- “I’m not a machine.” Checkbox — the typical “I’m not a robot” checkbox that occasionally appears on websites. All that legitimate users need to do is check the box. But in addition to clicking the box, customers will also need to complete a CAPTCHA if the visit appears suspicious.
- A checkbox is not needed for the user to see the invisible reCAPTCHA badge. Instead, it starts working when a user presses the current button on your form. Only suspicious traffic will trigger the display of a CAPTCHA; otherwise, legitimate users won’t be required to complete one (barring a false positive).
We’ll utilize the reCAPTCHA v2 “I’m not a robot” Checkbox technique in this example, but you may also use the Invisible reCAPTCHA badge if you’d like.
Finish by carrying out the following:
- Put the domain name of your website in the Domains box;
- acknowledging the terms of service;
- Simply press the Submit button.
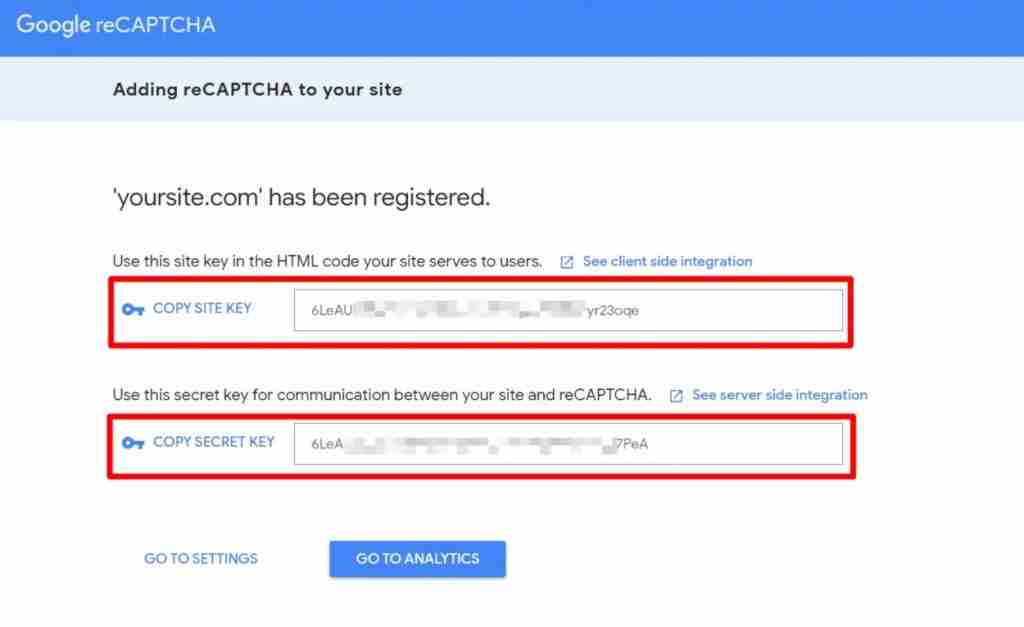
Your site key and your secret key are both displayed on the next screen. When working in your WordPress dashboard, keep this tab open and keep the following details close to hand because you will quickly require them:
4. Add the reCAPTCHA Field to Your Form with Profile Builder
You can now proceed to include reCAPTCHA in your WordPress forms.
You’ll proceed in the same manner whether you used the native WordPress forms or your own custom forms that you generated in accordance with the preceding section.
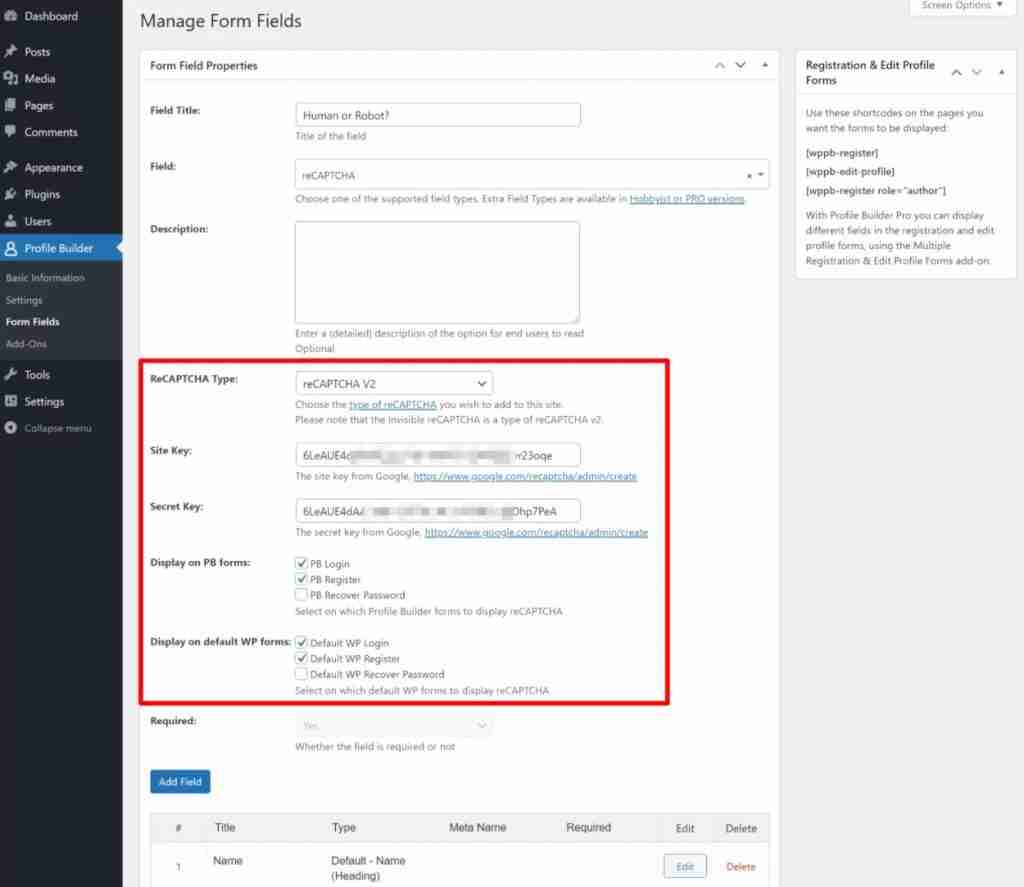
Go to Profile Builder Form Fields to get started. Add a reCAPTCHA field to the form after that.
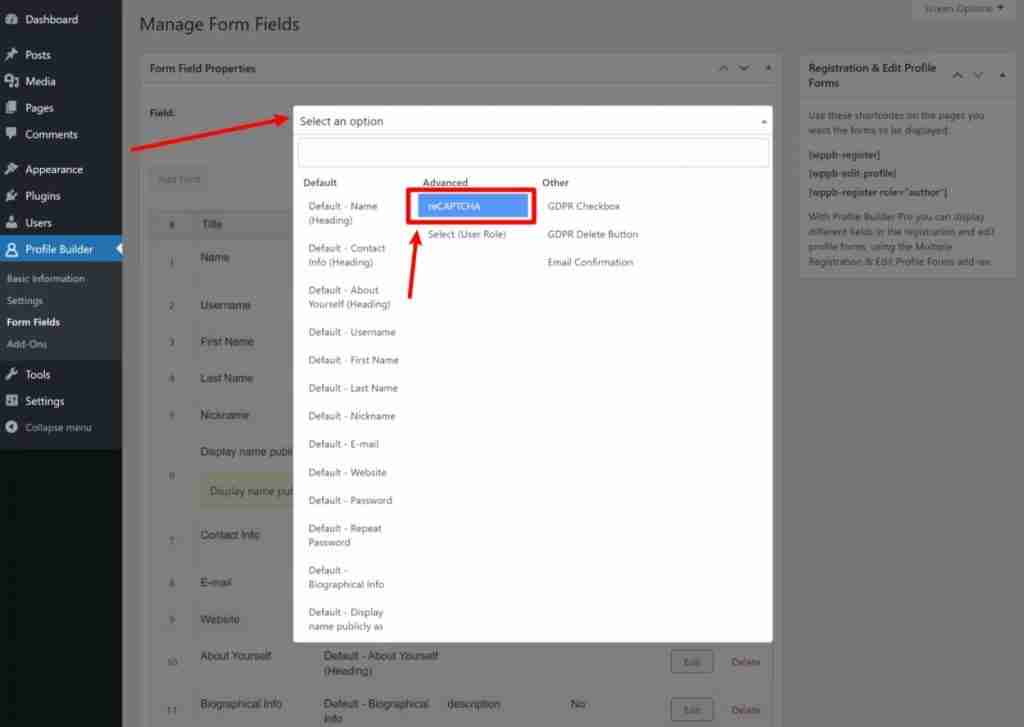
You should be able to define your reCAPTCHA behavior in the field’s settings once you’ve added the field. Use the ReCAPTCHA Type drop-down to select the type of CAPTCHA you want to add to your website first. This must be the option you selected when you made your reCAPTCHA API key in the preceding stage.
The Site Key and Secret Key that you obtained in the previous step should now be pasted in.
Select the forms you wish to use reCAPTCHA on last. You’ll have different options for the standard WordPress forms and the custom Profile Builder forms.
Once you’ve decided, press the Add Field button.
Conclusion
Profile Builder provides a simple method to secure your login, registration, and password reset forms if you wish to add reCAPTCHA to WordPress forms. You may either add reCAPTCHA to brand-new custom forms you develop or to the built-in WordPress forms (or both)!


